They estimated a week, but in the end it took them three weeks to complete the work. Where bricks simply fell out or where they couldn't find straight joints to work with they had to do real masonry repair, which took even more time. However, the main work is charged by wall cross section and not based on time, so the price didn't change. Now we're mainly waiting for the walls to dry out - we were told to wait around 6 months before plaster, which means late spring.
Here you can see a progress shot:
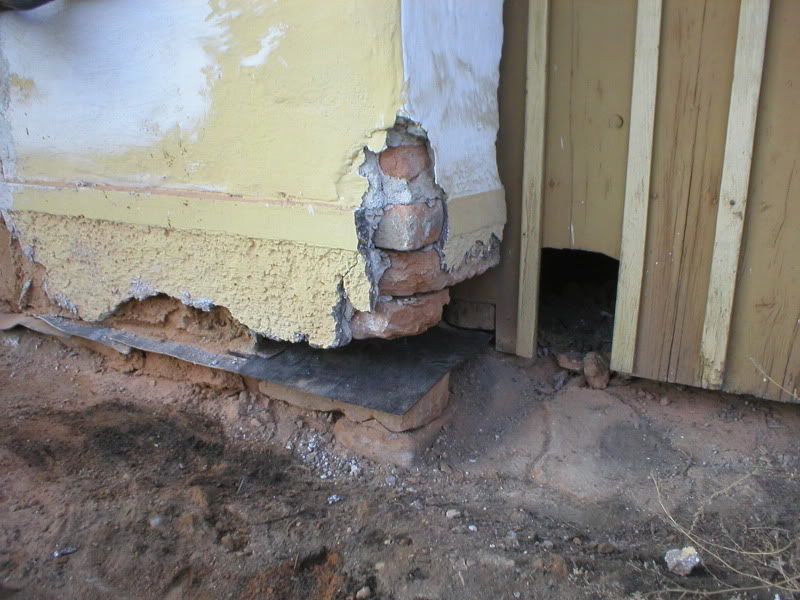
Mostly they cut underneath the floor, that means we don't have to worry about damp-proofing the wall underneath the damp course. The floor membrane will simply extend up to the damp course. The floors are going to be a very low-cement concrete mix, extremely thin (3cm) just to give a clean surface to work with. It is going to be covered with overlapped tar paper. To prevent creating a bath tub which keeps water forever in case of a pipe leak or other event, we intend to build a small gravel-filled sump in one corner of each room covered with felt (to keep the sump from getting filled with silt). The original plans didn't include that, the damp course company guy said overlapping and not connecting the tar paper would be enough, but I'm not convinced.
On top of this we're going to pour the screed in the bathroom and WC and do a traditional wood floor in all other rooms. That means a dirt or slag infill with sleepers and a floating wood floor. Not having it rest directly on the concrete has two major advantages: it makes the floor slightly softer to walk on and it allows us to be less anal about the height of the concrete.
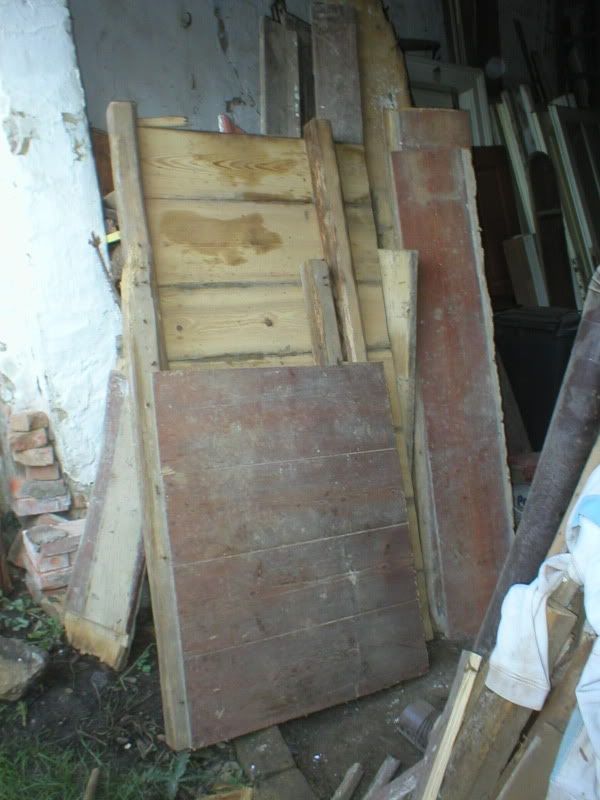
The guys were pretty good at their job, and they only caused me one minor fit of screaming (well, actually not even that, but it could have become one). They just cut two big honking pieces out of the non-rotted section of our plank floor!
The darker piece is the top, the light wood is the bottom of the second piece, including the sleepers the floor used to rest on. I mean we needed to pull this up anyway, but taking a chainsaw to the floor without asking?!?
So far we didn't get any noticeable cracks, but I think they won't be so bad anyway with all the plaster gutted.
PS: I started playing with the HTML code for the embedded pictures a little, we'll see if it worked. I don't have the slightest knowledge of HTML, but I tried to reduce the size of the embedded pics to thumbnails you can click on.
No comments:
Post a Comment