The floor still isn't grouted because I managed to pick the wrong colour when I bought supplies on a surprise trip to Vienna (some friends had booked tickets for a tour to a never-opened nuclear power station back in February and I'd completely forgotten about it) so the floor is still on hold.
Before the plumber arrived the bathroom looked like this:


On Thursday afternoon we bought a new drain assembly at a small hardware store just across the border because we didn't want to go the whole 50 km round trip to the nearest DIY store. It cost CSK 44 (less than €2) but it's half plastic so I'm not sure how long it'll last. Anyway, yesterday we finished the bathroom plumbing and now have a working sink - for the first time since 2009 I think.
Here's how the bathroom looks right now:


Yesterday I stripped all the door casings that had loose paint on it. I really don't like our new Black & Decker heatgun because it vibrates much more than the old house brand one we had before (the old one still works but it's in Vienna). My left hand still feels a bit numb from the work I did yesterday!
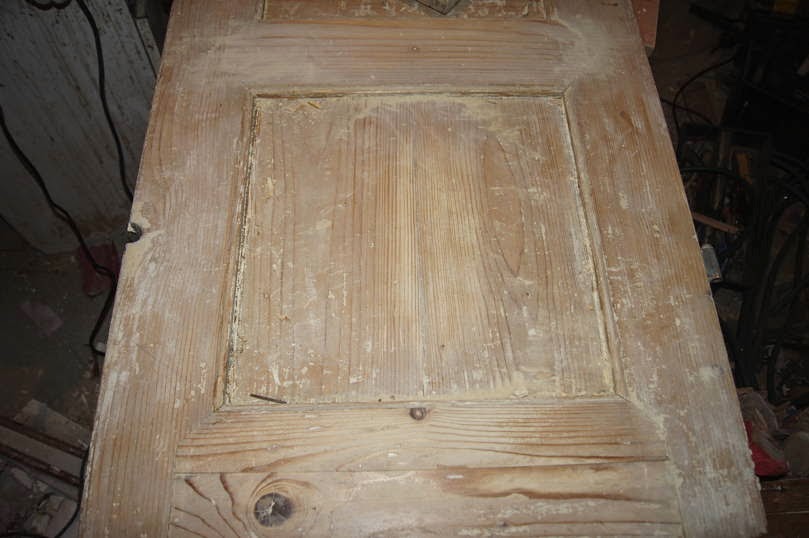
Once I was done with that I went on to repair a cracked door panel. The WC door is in somewhat sorry state. We found it leaning against a wall in a rather damp cellar so the bottom is quite badly rotted. The lock was frozen solid so I disassembled, cleaned and greased it. Also there were a few dozen coats of paint, some lifting and chipping from the damp. The bottom panel had a 5 mm crack running top to bottom ( a hide glue joint that separated long ago I think). Last year I watched a carpenter repair a door panel and used his technique. First I screwed blocks of scrap wood to the door on each side of the crack. Then I squeezed some glue into the gap (careful not to get any into the groove the panel sits in, the panel itself is supposed to move freely as the wood expands and contracts!) and clamped the wood scraps together.

When I tried cut and install the door casings I ran into a problem. We (and I think that means I) apparently made a systematic error sizing the frames for the salvaged doors. I'm not 100% sure what happened back then but I suspect I only measured the width of the door, neglecting the fact that there has to be a small gap between the door and casings so the door can move. On the existing doors that's between 4 and 5 mm on each side, so our frames are 8 to 10 mm too narrow. *ugh*
We decided to move the casings out by 2 mm on each side creating a wider rabbet on the frame and shaving 2 mm off the door on each side. That gets us the desired 4 mm gap. The only problem is that we need to deepen the mortice for the lock. That's what we're going to try today.
We can't hang the doors yet because the old-style hinges require a special chisel that can cut very thin grooves (1 to 2 mm) in a solid block of wood, sort of half rasp half chisel. These hinges are not screwed to the jamb but actually set into a pocket in the jamb and then secured driving nails through both the jamb and the hinge. The good thing is unless the jamb cracks these hinges are NEVER going to come back out. The bad thing is you need proper tools and it's not that easy. Our carpenter does have the tool but he's chicken that the aerated concrete block walls will tumble when he installs the hinges. Now I'm looking at one of those chisels on eBay. There's an Amazon seller who has two for €24 but he doesn't specify the thickness, which is pretty ridiculous since length and width really don't matter in this case. A woodworking online store sells them for €54(!) each! That's a whole lot more than I'm willing to spend for two doors!
Installing the sockets didn't go smoothly either. You're supposed to set the boxes flush with the wall and then tile up to the box so the socket itself is in fact installed on the tile. The holes are a bit off-set in this case and the old (1960s) sockets I wanted to use are designed to be installed flush with the box. With the tile beween socket and box the metal claws that can be used to hold the socket in place collide with the plastic bits of the box that hold the mountin screws (a continental European socket can be installed either using claws that spread against the walls of the box or using sheet metal screws on either side). Since the hole is a bit off I can't use screws (one screw hole is covered over) and the claws hit the box. I'll have to try to cut the tile back a bit or use modern sockets.
2 comments:
Nice work! I was surprised that you guys put up with a "sink-less" bathroom for four years. It must have felt good to finally have a fully functioning one! Though you have to be wary of the plastic drain assembly. There are instances of it breaking apart, so adding some extra supports for this sink might be a good idea. If you guys can find a better drain, get one as a reserve, in case the plastic one does fall apart.
Levi Eslinger @ Capital Plumbing
Well we're living at my granny's place across the street while doing the work so as long as we had running water from the temporary taps a sink wasn't really high on the priority list. Dirty water went straight into the outdoor drain (connected to the sewer), clean water went onto the lawn.
Tub drains have been plastic for ages around here (at least since the 70s) and I've yet had to see one fail unless smashed with a hammer. Our plumber even said we shouldn't leave an access hatch but just brick up the opening and tile over it, the drains would last longer than the acrylic bath anyway.
Post a Comment