Sunday, January 31, 2016

Plumbing

While the plumber (I can do some basic plumbing if absolutely necessary but I absolutely HATE doing it) installed the new copper water pipes in the kitchen the sparks could set to work in the hall - no point in rewiring the kitchen and keeping the old crap in the hall. My parents had an electrician check the wiring back in 1991 but the results were dodgy at best - they left some of the ancient cloth-covered wiring in place, worst of all the section right above the fuse board that fed everything but the washing machine and dishwasher sockets! The 2-way circuit for the ceiling light was left in place too - wired with what looks like 0.5 mm2 doorbell wire! 10 A MCB too, thanks heaven the wires only fed the light!

Wait, there's more of these wires, feeding a socket and on a 16 A MCB... never mind. (We've been aware of this fire trap for a long time and simply abandoned this socket so there's no risk).

In the hall there's a HUGE cupboard, I think some 2.5 m wide and all the way up to the ceiling. The lower part alone is almost as tall as it's wide and was probably built in the 30s. Must've looked grand when it was solid oak with panelled doors! Now the doors are covered with particle board and everything is painted green *blargh*
The upper section is MUCH newer, probably 1983 judging by the scribbles we found. Anyway, the wiring runs behind this monster, so we had to take the top off. Doing that took three of us, two ladders and a lot of balancing and cursing. Behind and above it we found a nasty surprise - the cool vintage wallpaper was hanging in tattered rags and there was serious water damage! When I saw that I immediately remembered a mystery flood over 15 years ago. For some reason I went into the cellar and found water RUNNING our of the walls! I immediately checked the ground floor and couldn't find more than a slightly damp spot but it was clear the water had to be from the 1st floor or even higher up. We asked our neighbour on the 1st floor but she swore she hadn't done anything. Since we didn't see any damage we thought the water must've run through some mystery channels in the brick walls and ignored the issue. Now we know that the water must've run down the wall behind the cupboard too.

The ceiling plaster was so badly damaged that we had to remove a section to check whether the joists and floor boards had suffered any serious damage but thankfully nothing there! As you can see there's one layer you don't usually find in UK or US ceilings and that's the reeds. They provide additional keying and that works quite well - unless the wires rust through such a ceiling simply can't collapse. Thankfully I found a roll of plasterer's reed mats in the attic so I could patch a little and then replaster.

When the sparks were done the plastering took me forever, even though one of my brothers helped some. In fact this dragged on well into 2016! The walls looked like Swiss cheese for a while so I guess you can imagine why it took us a while to get them closed up again. This picture also shows some of the dodgy old wiring partly removed.

We then had loads of trouble with the chimney sweep who insisted on some of the plumber's work being re-done and tile work took much longer than we'd expected but that's for another post.

Saturday, October 31, 2015

Kitchen Renovation - Work Begins

Once the kitchen had been cleared out, my youngest brother stripped the woodchip paper from the walls and ceiling. We also moved the cupboard into a spare room upstairs to hold our tools again. I swear, if I ever have to move this thing again it'll be in splinters! It's HEAVY! And have I mentioned big? Close to two m wide and 50 cm deep, nearly impossible to get around corners!

 Behind the cupboard we found two old wall designs, the top one probably done in 1932 before the new upper section was added. I like the older pattern much better!
With the woodchip paper gone the weird wiring routes came to light again. As I mentioned in the last post there were too few sockets. One above the cooker right by the window, one above the fridge and two by the door where no one could use them. The ones in the actual kitchen area were above the tile, probably because they were installed after the tile and did I already mention the previous inhabitants changed as little as ever possible? Fitting upper cabinets would have mostly blocked those two lonely sockets.
The original dishwasher wiring had been exposed grey conduit and clearly had to go (we removed the exposed section long ago and used the remainder to feed one of the two sockets by the door). That meant extensive wiring anyway so eventually the project turned into a full rewire.
We also really wanted to get rid of the small electric water heater. The taps needed brute force to turn off, the whole unit looked like it would explode any time and being an open system the flow rate was limited and every time the beast heated up it dripped water into the sink. And taps for open water heaters are expensive!

Since gas is much cheaper than electricity we wanted to have a gas-fired water heater installed. Ideally a 5l per minute over-sink unit like it had once been there but venting into the existing flue rather than into the room. The first plumber really tried to talk us into staying electric because it would be "much cheaper and better". He did send a quote  that came in at around three times of what we expected. Over-sink installation wouldn't be possible either because he expected the gas pipes weren't 100% tight any more and would have to be replaced if any work was done on them. A second, highly recommended, plumber was much nicer but his quote was nearly three times of the first one!

We then managed to talk my uncle into doing the work together with his former employer and bought a relatively new used Vaillant water heater. That way everything is legit and according to the regs but much cheaper. Gas regs in Austria are probably among the strictest in the world (only surpassed by Poland probably where the pipework is regularly inspected and tested for leaks by the supplier) and every change needs to be documented and signed off by the gas supplier. The newest edition actually requires homeowners to have their gas pipes tested for leaks by a certified gas fitter every ten years - otherwise insurance won't pay in case of an accident.

First we had the chimney sweep round for an inspection. The first time he showed up he couldn't do anything because the long-unused cleanouts on the roof had been covered over and needed to be opened (I think this set of three flues had been officially decommissioned for at least 25 years). We then got a helper up onto the roof and lit paper in the kitchen cleanout to determine which flue was ours. First we royally smoked up the kitchen because there were some 25 kg of sand and other debris in the flue, completely blocking it.
The eventual inspection went as expected, the "man in black" gave his OK on the condition of having a cast-in-place liner installed. That's just a fancy term for plastering the inside of the flue by pulling a piece of foam mattress up through the flue while at the same time pouring down cement slurry. Took a few hours and they were gone.

Moving the water heater as suggested by plumber #1 had the major advantage of being able to fit cupboards over the sink - the wall where the geyser will go now is too thin for hanging serious objects anyway. We had to remove a bunch of tiles though but some of them were damaged anyway - screw holes from pot racks, a big hole where the gas pipe for the old heater once exited the wall etc. Some of the tiles came off nicely, others stuck well and broke into tiny splinters, the last ones had to be chipped off with a kango!

Then of course we needed to run a hot water pipe to the sink. Opening the walls in preparation for that ruined even more tiles and revealed old lead pipes. Terrific! Of course one coupling started to leak immediately and trying to tighten the nut made it even worse. No loo there until I whacked another hole, discovered the transition to copper, cut that and capped it for the time being.

That's definitely not what you want to see when opening a wall!
The dark grey colour (silvery when scraped clean) and extreme flare whenever the pipe is joined are telltale signs of lead. Another is that lead pipe is rarely ever straight but usually a bit twisted and curved.
Note how they took the bottom part of a shutoff valve and used it as a T for the dishwasher tap! Of course I discovered this mess when all stores were closed. The next day I opened the loo wall all the way to the main stopcock only to discover that everything in the loo is copper anyway and only the 50 cm bit in the kitchen was lead. Of course I destroyed six tiles in the loo and we had a grand total of 5 1/3 left! It's just generic white 15x15 cm (6x6) tile so not that bad. The shade of white is never quite the same but that area has been patched before so it shouldn't be too bad. Those tiles cost us an incredible 6 Euros for a full square metre! Well, actually they were 25% off because the store was closing down so only 4.50.

Roughly at that point we decided that after 66 years the old kitchen tiles might have reached the end of their life span - there were more screw holes and some had plenty of ugly surface cracks. Off they came!

Downstairs Kitchen - Before

The downstairs flat was and to some extent still is a typical example of the Viennese OAP living space. Someone moved in there in the 40s or even earlier (some people were born there in the 20s and never moved) and grew old. Rents are tightly controlled in pre-1953 buildings so a flat becomes cheaper and cheaper the longer you live there. Most people didn't want to change much while living in the place and the flats end up being a bit dated. Like 60s kitchen, 70s bathroom, lots of wallpaper and the wiring a mess with bits of everything from 1900 to 1995 or something.

In this case some bank employee moved in there in 1949, had a new kitchen and bathroom fitted, a few light switches moved and not much else. The work was easy to date because whenever there were bigger holes in brick walls they were stuffed with newsprint and then plastered over. The wiring done at that time was shoddy, cloth-covered wires plastered directly into the walls or wrapped in newsprint and then plastered in. Except for two sockets in the kitchen and the dishwasher feed none of the wiring was earthed. What little earthing there was was mostly connected to the lead water pipes.

The only later changes involved adding concealed wiring for a dishwasher in the late 70s or early 80s and replacing some of the gas pipes around the same time. Oh and the wood floors (solid oak herringbone) were sanded and poly'd at some point. In 1990 the previous tenant passed away and my parents rented the place to use as an office. The bedroom became our guest bedroom. At that time they called in an electrician to replace the worst bits of wiring. I can't remember much of what his two chaps did but if what they replaced was worse than what they left in place it must have been seriously horrible! Back then no one had mobiles so one of them kept knocking on our door asking to use our phone because they were stuck again and didn't understand something :-)

With some help I rewired the kitchen in the mid-90s but didn't add any sockets or lights, just replaced what was there.

So basically until earlier this year the kitchen was still a perfect specimen of late-40s design. White tile with sharp edges, a white steel sink with blue rubber edge mounted on brackets, 70s gas cooker (when the city converted to natural gas most older cookers disappeared) and a huge cupboard from the 20s.

The walls have two layers of woodchip paper with paint in between. Above the awful brown fridge (once white, later adapted to 70s tastes) there once was a small hanging cupboard, that's why the second layer of paper is missing there. The oversized radiator extends all the way under that weird piece of chipboard next to the sink. Originally there must have been a small gas-fired water heater above the sink but that was replaced by the useless electric monstrosity when the gas pipes were redone. The abandoned gas pipe was still there in the wall, only filled with plaster and painted over to match the tiles. That weird tap with the silver pipe was for the dishwasher. The cut hose was still attached until last month!

Then there was this huge cupboard. Solid wood with plywood doors and one set of sliding glass doors. Looks nice but the paint was chipping off like crazy and each part had a different but equally annoying smell - perfume, washing powder, mothballs etc. Basically no longer usable in a kitchen. We later discovered that it was built in two pieces, the lower section probably in the 1920s, the upper part in Sept. 1932. Note how the worn paint was just patched around the locks! That was done everywhere in the flat, some doors have three different shades of paint on them!
To the right there is an original but heavily modified built-in cupboard that uses the space next to the curved stairs behind that wall. Originally it had two full-width doors, a taller one on the bottom and a shorter one above. During the big renovation the doors were cut in half or possibly rebuilt as double doors (terribly asymmetric), swapped around and the lower part built out almost to the window ledge. The horizontal surfaces were covered with green and white swirly boards - not formica as you might assume but actually asbestos cement!

The floor is terrazzo but not original. As far as I can tell there was no cellar underneath but at some point they dug out the space between the existing walls and put in a new concrete ceiling to create another room in the cellar. The same thing was done on the other side of the house some five years ago so I can guess how it used to look like here. Considering they actually replaced the terrazzo the work must have been done in the 50s or even earlier. The previous tenant had a large sheet of vinyl put down in the centre and that still shows as a weird dull spot.

Friday, August 7, 2015

Door and Floor

Of course everything took longer than anticipated. Installing the second layer of plasterboard and filling the joints took two of us over half a day, partly because we still had to patch in tiny bits of plasterboard (the door frame has a rabbet and that's just a bit wider than two sheets so we had to cut 2 cm strips). You can just see the wider white line on the left, that's where the narrow strip of plasterboard is.

To cover the narrow strips I put the second layer on sideways, that made the wall more solid but also meant more cuts, more waster and more joints. We also had to add a 10 cm strip at the top to avoid overlapping seams. Luckily we still had a leftover piece of greenboard I could use.

While we worked on the door my dad took the old beaten floor to the tip and when he returned the others left me alone to do even more shopping. The sleepers were spaced much too far apart so we had to add three new ones but we'd only found two in our storage (leftovers from when we renovated our own place back in the early 2000s).

Investigating a sinkhole near the window where the dirt had just disappeared showed that this isn't a dowelled log ceiling but rather a simple joist ceiling and where the floor boards meet the wall there's a gap. I slapped some flat pieces of brick down there and hoped that'd be enough. Ideally you'd remove everything and support new sleepers on blocks of wood or adjustable metal feet but that'd have been so much extra work we really didn't want to do this. In hindsight we'd have screwed a new floor on top of the old one instead of removing anything.
You can see in the pictures above how wonky the sleeper spacing was!

Adding the replacements involved digging trenches, then putting the new timber into the trench. checking whether it's level and if it isn't rocking it sideways to get some dirt out underneath until it's level and flush with the others. The trenching is usually annoying because only the top layer is fine sand or slag, underneath you hit larger pieces of broken bricks, pebbles and who-knows-what. The biggest piece I've ever found was nearly 3/4 of a building brick, that's a chunk about 6" wide, 8" long and 2 1/2" thick!
I got all trenches dug and two sleepers down by the time my family returned with the supplies so we put the final one in, back-filled with what we'd dug out plus some Liapor and paving grit.
Here I already have two sleepers down and the second one from the radiator is already mostly filled in. We ended up binning two buckets (10 litre each) of broken bricks that we didn't manage to bury again!
Then we started installing the floor boards. I'd been a bit wary about the screws as the last ones I bought from a certain DIY store were almost useless. The old-timers nailed down floor boards but these days there are special screws for the task that are supposed to be much better because they won't ever work loose. These special screws have tiny heads and the heads have rasp-like teeth so the screws can be counter-sunk without risking splitting the wood. Their tips are also shaped like drill bits and that's where the last screws I bought really lacked - they just didn't want to go into the wood!

This time I was luckier and we had a good start. Unfortunately it was pretty late so after only four boards we had to stop for the night. We then started moving stuff and only finished carrying furniture up to the third floor around 11.
On Wednesday we had an early start although work on the floor was delayed again because we needed to carry a desk. By noon we had around 2/3 down (all the way past the window) but I'd arranged to go swimming so I couldn't help any more. I definitely needed the break anyway, it was 30C and humid inside, we were quite literally dripping! We left damp spots on the boards every time we touched them!

After a relaxing afternoon at a lake I returned to the heat of the city, popped into Lidl's for some food supplies, grabbed a quick dinner at a newly opened Balkans grill place and was back to work a little past seven. We then finished the floor just in the nick of time at 8:30, just when the neighbour's kids had to go to bed! Now the floor has to be oiled (I think my brother will do that), some broken plaster has to be patched and we need something like skirtings. Real skirtings like you'd find them in the UK or elsewhere are fairly uncommon but in the fanciest houses (and this is humblest working-class bedsit-type) so we'll probably just nail down some triangular trim as they did back when the house was built.

While it isn't perfect it looks a million times better than the old floor and feels much more solid walking on it!

Next up: trying caustic stripper on the resilient paint I've talked about before.

Tuesday, August 4, 2015

Blocking a Doorway

The second half of the day didn't go too smoothly. We grabbed various additional supplied we had at home (like joint filler and screws) and set to work.

You're supposed to cut the steel studs using tin snips, that hardly worked at all at least with our tin snips - lots of cursing there. Once we had the U-shaped parts that go on the floor and ceiling cut I started to screw the first piece down. The screws we had, leftovers from a job my parents had done in 1987, were much too long and didn't really want to go through the steel so I first banged them in with a hammer and then used the drill to sink them. Once I had the first three screws in I realised I'd forgotten the foam tape - oops!
The picture is a bit blurry, my small camera has trouble focusing in some situations, but you can see how the U-shaped bit attaches to the floor. The C-shaped studs are then slid into these tracks and are supposed to be screwed together. That hardly worked at all, even if I managed to get a screw through the channel the stud just moved and bent. It's been a while since I last watched professionals build a wall like this but I seem to remember they used pop rivets rather than screws.
Installing the plasterboard wasn't much easier. The screws went through the board and that was it. Occasionally one went through the stud just like it was supposed to but most put up a big fight. Several times I was ready to throw my drill in frustration but chose not to although it might even have survived. With lots of cursing we managed to get each side boarded once, the fibreglass in without too much itching (including an emergency trip to the DIY store because we'd bought 100 mm insulation instead of the proper 75 and as it turned out we'd also gotten a type only suitable for ceilings. The stuff for walls only comes in MUCH larger packs, we hardly used a quarter of the expensive roll) and the joints filled. Tomorrow we'll add the second layer of plasterboard, fill and tape the joints and maybe paint (or just put some furniture there). Either way, once the filling is complete my work on that part of the project is done.

My brother got about half of the old floor out rather quickly but it was already late and around 8 a neighbour showed up and nicely asked us to stop so his kids could sleep. Tomorrow we'll remove the remaining bits and try to install the new floor down.
The construction of the floor was roughly what we expected and has some of the typical issues. For some reasons, probably mainly for sound deadening, the usual method for building floors back in the old days was a bit more elaborate than in most other countries. First they'd build a complete beam ceiling with 1" rough sawn boards or - for added fire resistance - entirely build the ceiling from logs  cut in half and hewn or planed on three sides, round side up. Since the logs are thinner than joists would be for the same span, those dowelled log floors are considerably more bouncy than regular wood ceilings.
On top of that they'd put a layer of some 10 cm of dirt, sand or whatever they had at hand, including broken bricks, pieces of china, tramway tickets, chicken bones from lunch etc etc. The actual finished floor is held by 2x3s floating in that dirt, not supported by anything else. Since the finished floor isn't really structural the builders in the old days skimped on anything you couldn't see and sleeper spacing is often a bit erratic and far more than you'd expect for 19 mm thick pine planks. In this case they were either pissed or one sleeper short or both as spacing varies from 55 to 115 cm. The largest gap is almost in the middle of the room and that's where the old pine floor was most damaged. Some of the tongues and grooves had actually broken because the floor was bouncy and not really supported by anything! So one of our fun tasks tomorrow will be to add one more sleeper by digging out dirt and somehow levelling the new timber.
Removing such a floor without disturbing the sleepers is tricky too because prying up the boards tends to pull up the sleepers too and then dirt seeps under them and they won't stay down. Today we worked as a team, some people just weighing the sleepers down to prevent that but we'll see how many people we're tomorrow.


Now I'm absolutely knackered and ready for bed!

Ugh

I'm back from a 10 day family holiday that could have been more relaxing - lots of driving, terrible traffic (German railways have become a bit unreliable but they're still a lot nicer than the motorways!) and too much in too little time.

Plans around here change every five minutes and the most important change is that my brother isn't going to move downstairs but two of my brothers rented a flat some 15 minutes walk from here. That does have some advantages as we now get spare rooms here so we can shuffle around stuff while we renovate and possibly even clear out the downstairs flat completely but it means yet another project!

The wiring was just redone but the walls need to be painted at least in some rooms and the floors are in rather bad shape. The smallest room is the worst, narrow tongue and groove pine planks painted brown and in spots worn down right to the tongue! We also need to block the door that connects the  large bedroom and living room, while it looks nice it won't be used and lets a lot of sound through. Yesterday we went shopping for tiles (some of the godawful 70s tiles in the loo were damaged when some plumbing work was done, thankfully the tiles and repairs paid for by the landlady). I don't really have anything to do with the place but I'm the DIYers so I took my brothers to the various stores and offered some advice.

Today we rose early (at least for a summer holiday) for another extensive shopping trip. Knauf UW and CW studs (sheet metal studs for partition walls), 8 half-sheets of plasterboard (2.6x0.6 m), mesh tape, some kind of foam tape that goes between the studs/base and top plate and the door jamb, fibreglass and last but not least 5 packs of 19 mm thick pine t&g flooring, 4 m long. At that point we could barely move the cart any more and it became clear that we wouldn't be able to fit all that into the family van. The large DIY stores run their own van rental so we asked about that, only to be told they were all booked out until Saturday. Then we asked about delivery but that'd have taken at least two days and one of my brothers would prefer to move in today or tomorrow. So we paid for our stuff and set on to making two trips with the small van. Just as we were leaving the store we heard someone calling out for us - someone had cancelled an appointment for a van and we could pick it up immediately!

My dad completed all the paperwork and since we'd just shopped for more than 250 Euros we got the van for free. It was a medium-size Iveco with a tarp-covered bed something over 3 m long so the plasterboard fit just fine and the floor boards didn't stick out much, well below the 1 m limit (if you exceed that you need to attach a red flag to the load). Driving it was annoying, Ivecos are odd beasts and being rentals doesn't make them any better but we arrived safely. Carrying the plasterboard to the third floor was a royal pain and we still have to get the five packs of floor boards up. My arms are already numb just from maneuvering the plasterboard! The stairs are a bit tight so the sheets barely fit and the floor boards are much longer! We'll have to lift them up and over the banisters every time we round a corner.

I'll definitely NEVER plasterboard anything unless I absolutely have to or unless someone else carries the stuff up the stairs!

In a while we'll leave again to close up the door (yay, itchy fibreglass!) and remove the old floor. That'll be a bit tricky because some of the boards extend under the plaster on the walls.

Sunday, June 14, 2015

That Other Project

There's a reason why so little has gone on at the farm. I'm the oldest of 4 brothers and 3 of us are still living at home in a kind of flat-share arrangement with my parents. In late 1990 we were only two children but living in a rather cramped flat (bedroom, our room, living room) so my parents seized the opportunity when a neighbour passed away and rented his flat one floor below to use as an office. The place was quite a mess, no central heating, bits and bobs of wiring done between 1914 and the early 80s, mostly by people who had NO clue what they were doing and cosmetically a wreck.

There are three rooms (or 2 1/2 as the Germans would say), two facing the street and one to the rear. The large front room (about 4x5 m) had a 1970s vintage tiled gas heater, a HUGE beast that blew as much gas heating a single room as the combi boiler upstairs did for heating a space almost 5 times as large. Occasionally when the thermostat kicked in it didn't ignite properly and sent an 80 cm wide and 40-50 cm tall flame shooting out of the front. Quite spectacular and a miracle it never set anything on fire! The small front room is only about 2x5 m and didn't have any heat at all. The former bedroom has a tiled wood stove from 1932. With the connecting door open the gas fire was just enough to heat both rooms but it was far from ideal. The kitchen had something I loved as a kid, a wall-mounted catalytic gas heater. These things have a rectangular vertical burner made of some kind of ceramic material with holes like a sieve. When the gas is lit the whole burner glows a nice deep red. It had zero safety features, no pilot light, no thermocouple, nothing. Open the gas cock underneath, turn the big knob to "Open" and hold a match to the burner. Scarcely used it gave a unique smell of charred dust every time it was lit. Aaah, memories of the past!

Every room was wallpapered all over, including the ceiling. The living room had some kind of glossy, embossed beige paper, really fancy stuff! The bedroom had huge (think 20 cm) green flowers all over, the hall brown, green and yellow leaves on a grey background and the kitchen... woodchip! All doors and windows except in the kitchen were painted a dull grey and the furniture they'd left us was a weird yellowish green. All rooms had the original oak herringbone parquet but not all of it in good shape. The finish in the living room was dull and brownish the day we got there and the hall wasn't much better. To make matters worse. they hadn't finished the floor where they had a runner, probably to keep the runner from slipping. With the runners gone it looked horrible!

At that time it wasn't sure how long we'd be able to keep the place so my parents only put a minimum of effort into it. They had an electrician replace what he considered the worst of the wiring (if it actually was it must have been seriously shoddy because what's left is horrible enough to me), the bedroom stripped and painted, the living room and small room repapered (woodchip paper) and the hall painted over the wallpaper. The living room became the office, the bedroom was turned into our guest bedroom and the kitchen was dubbed our workshop, the remaining cupboards filled up with tools and materials.


In the late 90s the gas fire failed for the third time in a row and my parents refused to spring for another expensive repair of that useless beast, opting for a combi boiler and radiators instead. The plumbers who'd installed the heating upstairs were called in and spent three days running exposed copper pipes and installing radiators. My mom was less than pleased when she discovered that the coat rack in the hall had become useless because these geniuses had put a 90x90 cm radiator underneath. When she complained she was told "Madam, we have to use a radiator of this size, otherwise the room could remain cold and you could sue us!". Well, aren't there different sizes and shapes of radiators with the same heat output? They could've used a deeper model instead and they could've put it somewhere else. The kitchen was almost as bad but I'll show that later.
They also opened the hall floor in spots to run the pipes, with catastrophic results. Not that the floor looked that great to begin with (note the odd lengths and mixed widths) but the plumbers broke several boards trying to remove them and put everything back even more rattly than it'd been before. One board seems to have lost its tongue and groove and can almost be pulled out now. The original parts of the floor have rather big gaps too and are uneven so sanding isn't really an option any more.

We're all thrifty people so if things might be useful again at some point we don't throw them away. Unfortunately stuff tends to accumulate and ideas whether something might still be usable change over time. Bluntly speaking, the place eventually filled up to the ceiling. The small room became home of my vintage computer collection, my dad's double bass, part of our old toys etc. When my granny moved permanently into the guest bedroom in late 2004 the computers and toys were joined by boxes and boxes of books up to the point where you simply couldn't walk through the door any more. The workshop suffered the same fate over the years, although a path towards the window was kept aceesible since we occasionally needed tools and materials. Besides, the door opens inwards, so we couldn't fill up the room to capacity. When my granny moved upstairs in 2006 the guest bedroom received the remaining toys and lots of other stuff. The hall held our skiing equipment, half a tonne of printer paper in all colours of the rainbow etc. etc.

The big crash came when my youngest brother begged to move down there when he turned 18 last year. That meant clearing out the guest bedroom, the hall and the workshop-to-be-kitchen-again. Completely. We started that mammoth task last autumn and are still far from done. Twelve tip runs with the family van filled up to the roof and I think there's still lots of stuff left that'll have to go. Countless boxes of inherited baby and kid clothing were sorted through, binned or donated to a charity. My mom was showered with bags and boxes of clothes by everyone, some of it 60s or 70s vintage. We wore some of it but nowhere near everything - some of the stuff was too clearly designed for girls even for my mom's liberal tastes and some of it was plain useless but she thought the owners might want it back for future grandchildren. When our youngest outgrew everything she still clung onto it for somewhat superstitious reasons but anyway. Now she changed her mind and we drastically reduced the pile. I couldn't resist keeping some of the extreme retro stuff (think red corduroy overalls for toddlers) but I'd say we got rid of 9/10 of the stuff. The majority went into the bin and everything else was donated.

By now the kitchen is empty and the hall sort of so we're about ready to start some serious renovations. We should also clear out parts of the cellar to have them renovated so we can store paint and other stuff there. Currently that part of the cellar has a dirt floor, unplastered walls with crumbling mortar and uninsulated water pipes that sweat like crazy when it's over 20C outside. There's an old rotted broom cabinet in there (again inherited), piles of flower pots, lawn furniture (taken out of someones hand at the tip before it became city property), roughly 10 bags of mixed wood, mainly leftover parquet flooring, door casings, subfloor boards we removed during the upstairs renovation (now growing all kinds of fungi) and a stack of original window casements that were removed from the twin house next door - our windows facing the courtyard were replaced in the 70s and now sport lovely aluminium hardware instead of brass and I'd love to turn that back to original. Unfortunately the replacements do have a few serious advantages like being more raintight and easier to clean without climbing out onto a 15 cm wide ledge 10-12 m up in the air. Now I'm totally lost what to do with the old windows.

I'm also in the process of reducing the computer collection. Thankfully I found a collector who'll buy most of the Amiga and Commodore collection and the entire Atari collection but I still have to find someone for the Apple stuff. Today I'll try to copy some of the stuff from the hard drive of my broken Amiga 2000 by putting the hard drives and controller card into another A2k. Fingers crossed that'll work, the other 2k has newer Kickstart roms and I generally handle Amigas with velvet gloves because I've never really understood their inner workings. In a 1989 Mac you'd just stick in any SCSI drive with the proper ID, boot from the Utilities floppy, format the HDD, install the OS and it'd boot straight away. Installing a hard drive in an Amiga seems to imply chnaging miles of startup scripts etc. etc. - scary! I suppose that's partly because the Amiga wasn't really designed with hard drives in mind but the mac was.

Tuesday, June 9, 2015

Ooops...

 I just realised that I'd actually written this post but never published it! If you read the previous two posts you'll have guessed that some of the points from this posts have already been crossed off the list but I'll add a summary at the end of this post. Now for the original post:

A while ago I was actually told to update my blog, so it seems like I do have at least one reader.

Work on the house sat on the back burner for a long time, but finally there is some progress to report!

In 2012 I tiled the WC. We chose the same pattern as the bathroom, white 8x8 tile with a black 2x8 border below the top course and 2x8 black base trim. It's essentially modern but at least it has a traditional look about it and it was CHEAP. The floor is black and white checkerboard. Unfortunately, only after opening the boxes we dicovered that the black tiles were considerably smaller than the white ones! The store told us that we had to expect 5% size variations, but that was way beyond 5%. In the end we grudgingly went on installing the tiles using creative spacing. With white grout the end result looks a bit like black tiles swimming in a sea of white but black grout tends to get dirty rather quickly so I suspect we'll use white for the bathroom as well.

We also tiled part of the bathrooms walls, so the plumber could install the toilet and all radiators. So we finally have a working toilet! It still lacks some minor details such as a door though...
We then installed the final hallway floor and refinished it. I posted about the experience here:
Saving a Floor

Once the floor was down the plumber could install the boiler and water heater, so we finally had heat! He also installed the bath tub at that time.

In late 2012 work ground to a screeching halt as we first had a new heating system installed in Vienna and then had horrible water damage after a fire two floors above. Replacing the floor and fixing everything else in my bedroom kept me busy well into the summer of 2013.

We then puttered along with the house but didn't have much time to spare. Yesterday I finally managed to finish tiling the bathroom walls. The last fiddly bits around the door, the window and the bath skirt took forever! I spent two days just tiling the bath skirt and those fiddly bits, then got more than a third of the floor done in one evening. Our carpenter had installed some salvaged trim, but apparently his vision is slightly impaired, at any rate he managed to use three(!) non-matching pieces. Besides, he was - despite of having been told otherwise at least three times - convinced that the door was to swing out into the hallway. Long story short, I had to take all the trim back down.

Things left to do:
- finish tiling: Done
- grout: Done
- caulk: about 3/4 done
- strip and install door trim: done
- have door hung or hang it ourselves: mostly done, still needs a strike plate and lock
- paint: walls are done, door isn't
- install window handle
- have plumber install taps and sink: done, everything in working order
- scrub various paint and mortar splatters and dirt off the wooden ceiling: partially done.

Unfortunately the mortar and old paint bleached the wood so even if we get the ceiling clean there are lighter spots. Not sure what we'll do about that.

We did choose black grout and so far it's holding up surprisingly well.

Progress

Some thing actually got done in the meantime. We started caulking the bathroom (but ran out of silicone and didn't want to open the second tube before we can finish the job properly, i.e. after the door frame is painted). Also note that the wiring is finally finished! The lower single socket is for the washing machine and the double is for hairdryer, electric toothbrush etc. I'd have liked to have that next to the sink but that'd have been too close to the bath (60 cm minimum distance).


The bathroom door was a major pain in the rear. I'm not sure if I've mentioned it before but it nearly made me give up. We somehow miscalculated the opening size and had to cut down the door to make it fit. The door has a rabbet (like all vintage and most new doors around here) so the curcular saw is mostly out. I gave the router with a rabbet bit a try and it sort of worked but didn't get too smooth, no matter what I did. It took like 5 or 6 passes and some work on the casings to make the door sort of fit (the walls were already tiled so I had to plane down the casings and then even cut down the tile slightly). Then the hinges gave me trouble. I'm using traditional pocket mortice hinges and that's a bit tricky. The hinges I had didn't really match the ones already on the door either so first I had to shorten the pins with an angle grinder. Then the hinges ended up being a bit off so hanging the door was quite tricky. Trying to fix the bottom hinge in place I broke two drill bits. Then I realised the hinges were too close to the opening and I had to cut down the door even further. The final straw was the lock. It's a door with glass panels and the stiles on either side of the glass are unusually narrow, requiring a non-standard mortice lock. Unfortunately some moron had kept the lock when he ditched the door. I even had some locks that are the right size but for the wrong door swing... ugh. We'll likely use a modern lock for steel doors which fits but takes a cylinder rather than a skeleton key (and costs three times as much). And that's not even all the trouble we had. That'd include ripping up the wall in order to sister the frame because one of the hinges had ended up in the aerated concrete block wall rather than in the timber.

That's the door I talked about in the last post. I think at the top right corner I used the heatgun for some reason but not sure about that.

While I messed around with stripper my dad and my brother stapled up the vapour barrier on the hall ceiling. Actually I should say nailed because the staples just shot through the plastic and they had to use nails instead.
When the plasterer came he just cut off everything below what he considered the finished ceiling level - in some spots above the goo that's supposed to seal the plastic to the wall. I hope he added some more before he plastered, otherwise we might get a nasty surprise in a few years.

Both the hall and kitchen ceilings are plastered now, that's the biggest news. I'd have preferred a full plaster & lath finish but the plasterer convinced us of letting him use Heraklith board instead of lath, pressed wood shavings mixed with cement. It only takes one coat of plaster so it's much faster to do. I'm a bit worried about cracking seams but they used fibreglass mesh, we'll see how that works out. I think Heraklith was invented in the 20s or 30s and had mostly replaced wood lath by WWII. It comes in thicknesses from 15 mm to 75 mm I think. The thinnest stuff is for ceilings with plenty of support and the thickest blocks can be used for partition walls like huge bricks. The narrow hall was done with 15 mm board and the kitchen with 25 mm.

We have another monstrous project in the works at the house in Vienna but I'll dedicate another post to that. Or rather a series of posts I guess.

Monday, October 27, 2014

Still crawling or just standing?

The beginning of a new university semester, along with the usual leftover exams from last semester (according to Austrian law you have four chances to sit a lecture exam, one at the end of the semester, one at the beginning of the following semester, one in the middle and one at the end, half a year after the first. It's your choice which one you pick, although the longer you wait the less you remember of the lecture and if you happen to fail one sitting, you can always re-sit the exam - provided you didn't fail the fourth sitting). That was quite stressful and kept me from working at the house.

Last weekend was dedicated to the renovation again but not much was done. First I tried the chemical paint stripper on the bedroom door. My verdict: never again! The manufacturer/distributor didn't bother to provide a proper MSDS sheet so I was left to guesswork, but my dad, who studied chemistry, said the stripper is probably ethyl acetate based. Not very toxic, but incredibly smelly and it can make you slightly dizzy.
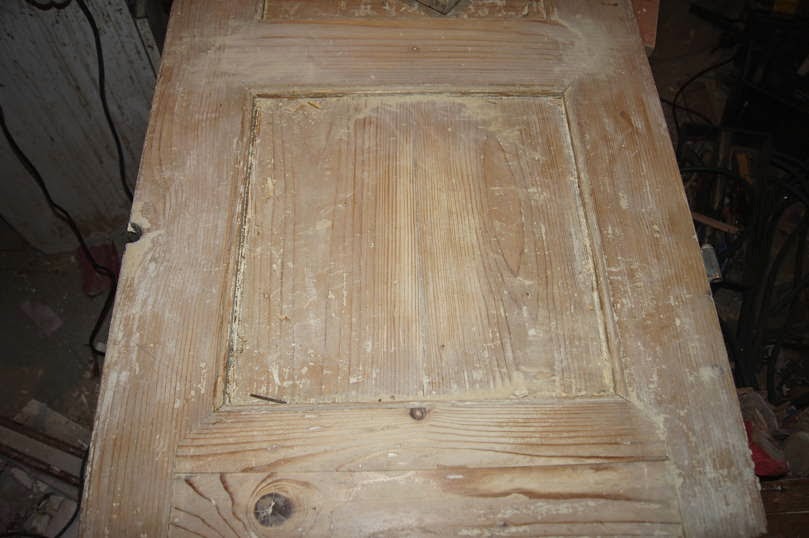
Worst of all it didn't work. Not too well at least. The first side of the door was covered with stripper and then cleaned up with a scraper one hour later. The very top coat bubbled up nicely and prevented the solvent from reaching all the others! It was possible to remove the top coats of white modern oil paint with some (considerable) effort but the original grey linseed oil paint just laughed at me. Fair enough, at least it's smooth enough to paint over.

The second side was even worse. This time I covered the stripper with a polythene sheet and let it sit for almost four hours, hoping the paint would soften more. Ha! This side had three layers instead of two, the top coat(s) of white oil paint, an unknown yellowish layer and the grey linseed oil paint. The white separated, as before, the yellow gummed up and turned incredibly sticky and the grey didn't budge, not even in spots where the other layers had chipped off and I applied the stripper directly to the linseed oil paint. It took hours with a scraper, steel wool and paint thinner to get most of that crap off. That leaves sanding, some filling and painting.

I also fixed the attic door. Apparently some time after installation the door expanded and popped off the casing with the strike plate. I completely removed that, removed some plaster so I could move it slightly outwards and then nailed it back into place at a slightly different angle, moving the bottom away from the door by a few millimetres while keeping the mitred joint at the top more or less tight. While doing that I discovered that the door had an incredibly thick layer of paint and wood filler in spots (I swear, some of it was several millimetres thick!) that prevented it from closing properly. So I grabbed the heatgun and removed some of that. Turns out the door was originally shellaced and cleans up rather nicely! I ended up stripping half of it in just a few hours. I'd love to take it back to exposed wood but we'll see how that goes. There are three doors in that section of the hall, one was simply painted over the original shellac (perfect for stripping), one had the shellac mostly removed but enough left for easy paint removal and the third, unfortunately, has always been painted. Maybe I'll just repaint that a dark brown to match the other two doors as closely as possible.

No pictures unfortunately, as I was in quite a hurry.

Friday, August 29, 2014

Crawling Along

We're still working on the house but completion doesn't seem to be any closer. We've arrived at the stage of a thousand tiny little things, at least as far as the rear section of the house is concerned.

Here's what happened so far:

The bathroom floor is grouted. We used black grout and it was super-messy!
Getting all the black stuff off my fingers took TWO weeks! The floor is done except for the silicone along the walls.

We also did a lot of time consuming wood repairs. Thankfully one of my brothers actually had to do some basic carpentry practice at the university so he knew what he was doing to some extent. Our selection of tools is a bit limited. The table saw is an Aldi special from the late 90s and while I've used it to install over 800 sq. ft. of solid oak herringbone it definitely lacks features (fixed cutting depth) and precision. Our B&D handheld router was on clearance "as is", i.e. with a worn bit stuck in it and without any accessories. We do have a set of decent chisels and a Japanese saw that makes very smooth and straight cuts. This was used for cutting the tenons.


 Originally the door was assembled without any glue, only wedged mortice and tenon joints. I'd have liked to keep it that way but since we had to cut off one of the stiles right at the tenon we needed to use some glue. Since no one keeps 2 m C-clamps at home we used a few ratchet straps to pull the glue joints together. The work would have been a bit easier with quality lumber but we wanted to make do with what we had at hand and that was scaffolding planks - awful stuff for finish work! We had to use them for the door frames because they're essentially the only kind of 5 cm thick lumber wider than 8 cm (i.e. larger than a 2x3, 2-bys aren't standard in Europe except 2x3) and had some leftovers we used for the door repair. 2x3s would have done the trick but those we had were even worse. Here's the almost finished product minus cutting the tenon to size in the rabbet and sanding down the patch a bit with the belt sander. For some reason we cut the patch too short so we had to add onto the other side as well. The last patch was further up the door were a huge knot (3 cm in diametre or so) had fallen out during paint stripping.

Then we cut the casings to size, nailed them to the frame and I could hang the door, a first for me. As the door has a rabbet you can't simply screw hinges to the jamb. The modern solution is a screw-in hinge - essentially a 6 mm machine screw drilled into the wood. You can probably imagine the equation wood + machine screw + heavy door = trouble. Those hinges twist under the weight of the door or even rip out. The result is far too often a door that scrapes across the floor. Besides, compared to the old large hinges the modern ones look pathetic.


That's why I insisted on using traditional hinges. As you can see these are a bit more tricky to install as you need a long and very narrow (1.5 or 2 mm) pocket in the frame.


This pocket is made using a special chisel that is half chisel half rasp. Since these hinges are far more labour-intensive to install they fell out of favour in general construction in the 1960s and today only few carpenters still know how to work with the old type and have the tools. We did find a carpenter who hung two doors for us but he refused to do the bathroom and WC doors because he was afraid the frames would fall out of the wall. Long story short, after much hemming and hawing I bought a 2 mm chisel on eBay for little more than a cheap lunch and tried my hand at hanging doors. The first one was relatively smooth although I hammered the hinges a bit too far into the wood. That was easy to compensate by bending the hinges on the door.

The bathroom door was more problematic. If you look at the drawing in the second link above you'll see that the actual hinge is rather far from the opening on the left-hand side. Since we had mis-measured we widened the rabbet on the frame and that moved the hinges even further left. That means I ended up morticing the hinges into the wall instead of the door frame... which means we have to open the wall from the other side, double up the frame and replaster. *sigh* I also had to cut down the tiles so I could fit the door casings. First I tried a carbide file but that didn't work too well against the wall. Then I used a Multimaster knockoff with a carbide disc that had been sold to me as "good for tile". Needless to say that after roughly 60 cm of soft wall tile the disc was bare.
We already decided to rip out the kitchen door frame and widen it by 2 cm instead of playing this stupid game again.

I also discovered that every single door needs to have the paint stripped off. Some of the old paint jobs (or the prep underneath) are flat out horrible! One door has more than 5 mm globs of wood filler in the corners! It's a miracle the unknown painter didn't decide to fill in the panels completely to "modernise" the doors! Unfortunately more than half of our doors are from the same place and were painted by the same fool. Even worse, there are three coats of paint and the first two are crackled and chipping but in general rock-solid linseed oil paint. The heatgun doesn't do much but gum up the old paint. I bought a bottle of solvent-based stripper two years ago so I guess I'll give that a try. I just need to clear enough space and build some kind of large tub to catch the softened paint and stripper for disposal.

On the bright side the bathroom, rear hall, WC and small bedroom are whitewashed and look fairly finished!

Sunday, July 27, 2014

Plumbing, Tile and Carpentry

As promised, here are a few pictures of the bathroom nearing completion!
The floor still isn't grouted because I managed to pick the wrong colour when I bought supplies on a surprise trip to Vienna (some friends had booked tickets for a tour to a never-opened nuclear power station back in February and I'd completely forgotten about it) so the floor is still on hold.
Before the plumber arrived the bathroom looked like this:


 On Thursday afternoon we bought a new drain assembly at a small hardware store just across the border because we didn't want to go the whole 50 km round trip to the nearest DIY store. It cost CSK 44 (less than €2) but it's half plastic so I'm not sure how long it'll last. Anyway, yesterday we finished the bathroom plumbing and now have a working sink - for the first time since 2009 I think.
Here's how the bathroom looks right now:


Yesterday I stripped all the door casings that had loose paint on it. I really don't like our new Black & Decker heatgun because it vibrates much more than the old house brand one we had before (the old one still works but it's in Vienna). My left hand still feels a bit numb from the work I did yesterday!

Once I was done with that I went on to repair a cracked door panel. The WC door is in somewhat sorry state. We found it leaning against a wall in a rather damp cellar so the bottom is quite badly rotted. The lock was frozen solid so I disassembled, cleaned and greased it. Also there were a few dozen coats of paint, some lifting and chipping from the damp. The bottom panel had a 5 mm crack running top to bottom ( a hide glue joint that separated long ago I think). Last year I watched a carpenter repair a door panel and used his technique. First I screwed blocks of scrap wood to the door on each side of the crack. Then I squeezed some glue into the gap (careful not to get any into the groove the panel sits in, the panel itself is supposed to move freely as the wood expands and contracts!) and clamped the wood scraps together.


When I tried cut and install the door casings I ran into a problem. We (and I think that means I) apparently made a systematic error sizing the frames for the salvaged doors. I'm not 100% sure what happened back then but I suspect I only measured the width of the door, neglecting the fact that there has to be a small gap between the door and casings so the door can move. On the existing doors that's between 4 and 5 mm on each side, so our frames are 8 to 10 mm too narrow. *ugh*

We decided to move the casings out by 2 mm on each side creating a wider rabbet on the frame and shaving 2 mm off the door on each side. That gets us the desired 4 mm gap. The only problem is that we need to deepen the mortice for the lock. That's what we're going to try today.
We can't hang the doors yet because the old-style hinges require a special chisel that can cut very thin grooves (1 to 2 mm) in a solid block of wood, sort of half rasp half chisel. These hinges are not screwed to the jamb but actually set into a pocket in the jamb and then secured driving nails through both the jamb and the hinge. The good thing is unless the jamb cracks these hinges are NEVER going to come back out. The bad thing is you need proper tools and it's not that easy. Our carpenter does have the tool but he's chicken that the aerated concrete block walls will tumble when he installs the hinges. Now I'm looking at one of those chisels on eBay. There's an Amazon seller who has two for €24 but he doesn't specify the thickness, which is pretty ridiculous since length and width really don't matter in this case. A woodworking online store sells them for €54(!) each! That's a whole lot more than I'm willing to spend for two doors!

Installing the sockets didn't go smoothly either. You're supposed to set the boxes flush with the wall and then tile up to the box so the socket itself is in fact installed on the tile. The holes are a bit off-set in this case and the old (1960s) sockets I wanted to use are designed to be installed flush with the box. With the tile beween socket and box the metal claws that can be used to hold the socket in place collide with the plastic bits of the box that hold the mountin screws (a continental European socket can be installed either using claws that spread against the walls of the box or using sheet metal screws on either side). Since the hole is a bit off I can't use screws (one screw hole is covered over) and the claws hit the box. I'll have to try to cut the tile back a bit or use modern sockets.

Thursday, July 24, 2014

Bathroom Progress

I arrived late on Sunday and set to work on Monday (not that early either). Tiling the floor turned out to be more problematic than we'd expected because the tiles are so incredibly hard!

I'm not sure if I've mentioned that before but the idea was to do everything without power tools, except for drilling a few holes. We had a tile cutter, carbide saw, carbide file and tile nippers. These tools worked like a charm for the wall tiles but not so much for the harder floor tiles. In fact after the first cut the carbide saw didn't really cut any more. We managed to cut the first tile around the floor drain taking turns with the saw (I think the two 5-cm cuts took more than half an hour) but the second one broke at the very end. My dad decided to superglue it back together instead of recutting it, I only hope that won't cut any toes. At that point we'd happily have used the angle grinder but unfortunately it seems to be in Vienna. Around 10 PM the floor was still 9 tiles short, two of which needed deep (10 cm) cutouts for the radiator pipes. I also ran out of thinset and motivation so I called it a day.

On Tuesday I started by scraping any excess thinset from the wall tile joints, which took a few hours as well. Then we went to the DIY store because we had to buy fixtures and black flexible grout for the floor. We didn't get any grout because two DIY stores only had non-flexible black grout and we're worried about cracking since the tiles are installed on EPS board. We did grab a super-cheap angle grinder (€29.90) and a tile cutting blade (set of three for €5.99, a single one would have been 26.99).
Back home I started grouting the walls and when I ran out of motivation after 1 1/2 walls finished the floor.

Yesterday I finished grouting the walls and we did a lot of cleanup in preparation for the plumber to come today and install the sinks, taps etc. Once that was done I stripped some door casings so we can get the bathroom close to finished. We have a huge pile of casings but most of them are lonely individuals and it's hard to find enough for a door. The first set I stripped was originally finished with shellac and came out really nicely so it seemed like a crime to paint it. The bathroom door was originally painted so I needed more casings.

After a lot of searching I found two matching upright pieces but no top piece and no other matching pieces I could shorten. Nothing. The second round of searching yielded the remains of one long piece - cut in half lengthwise by our beloved carpenter. You really can't let him work without constant supervision! Late at night I finally found another matching piece but two out of the three pieces have various strike plates that need to be removed, the damaged wood cut out and patched.

Today the plumber arrived at 10 and I helped him install everything. The bath taps went in flawlessly, as did the washing machine tap and trap cover. Then I installed the small WC sink while the plumber did the bathroom sink. He quickly discovered that we'd bought the wrong type of drain assembly! We'd thought we'd use the type that uses a lever to operate the plug but in fact the mixer taps we bought don't have that lever (I think it's actually designed for a kitchen sink) so we need a drain for a rubber plug. Other than that the bathroom is now in working condition! The WC sink made a bit of trouble as well. Long ago when I did the drains I must have mis-measured somehow so the drain was far too close to the floor. We ended up using the longest trap pipe we could find and a 10 cm extension on top of that. Looks a bit weird but functional. I only hope no one ever bumps into that contraption.

So where are we?
The bathroom floor needs to be grouted, all the corners need a few miles of silicone, the doors have to be hung and painted, the walls have to be painted and I still have to install sockets in the bathroom (yup, we can have that here provided they're at least 60 cm from the shower or bath).

Pictures to follow soon!

Saturday, June 14, 2014

Tiles

I promised a more detailed update on what little work we did over the last 2 years and here it is.

We're mostly done tiling the small WC and the larger bathroom but not quite there yet. I'd have loved to do a real vintage-style tile design but this is a family job and my parents own the house, so they had a substantial say in this. In the end after lengthy discussions we agreed on plan white 8x8 (20x20 cm) tiles with black skirting (base trim) and border. Shopping for tile was an experience in itself since this plan was absolutely against current fashion trends. First we went to a small tile and construction supplies store. Most of the tiles the elderly owner showed us were huge (up to 12x24 or 30x60 cm) and beige-y or grey. I said we didn't want beige or grey tiles because they didn't look too good with our existing wood ceiling. To which he replied: "You have to lower the ceiling and plasterboard it anyway! For the recessed lights!" (he used the pseudo-English word "Spots" and pronounced it "Shpotts", which sounds like Spott, German for ridicule). At that point I was ready to ignore all his advice.

Off we went to the next store. They had a small selection of smaller white and solid-coloured tiles and we eventually agreed on the cheapest. This manufacturer didn't offer border tiles and we thought we could avoid ordering Villeroy & Boch borders by cutting our own.

For the floor we chose black and white tiles from the same manufacturer for a chequered pattern (and mentioned this plan to the sales girl). This bit of info will become important later. Order time was 4-6 weeks so we had some time for other stuff. The two rooms are small (the bathroom is 2.35x1.85 m or slightly over 8x6' and the WC is only 0.9x1.2 m or 3x4') and we didn't tile up to the ceiling but we still had a lot of tile boxes. Heavy boxes! I can't remember the weight but I think we essentially maxed out my parents' trusty old Mitsubishi van since we also loaded about 150 kg of thinset and 50 kg of self-leveling floor leveler.

Tiling was a rather time-consuming process, especially the small bits and pieces. The large sections of wall that mostly use whole tiles go reasonably fast and then when it comes to cutting every single tile progress slows to snail's pace. I'm not awfully fond of tiling either but at least I'm getting better at it. My first tile job far back in 2002 definitely sucked!
We did the whole job almost without power tools, except for a drill with masonry bit. Our tools were a traditional tile cutter (first we borrowed one from a friend's mom, then I bought a used one for 5 Euros and finally we broke down and bought a new one for 65 Euros), a carbide file, tile nippers and a large tile saw (looks like a giant coping saw). For the softer wall tiles these tools are rather easy to use but for the hard floor tiles the file was essentially useless and the saw was hard on the arms as well. On the other hand the hand saw allows for rather intricate cuts that just aren't possible using a wet tile saw or angle grinder. Electric tile saws are great for some kinds of tile (I once had to lay large rock-hard floor tiles with a surface scored to look like small brick with wide joints and those were impossible to cut without a wet tile saw) but generally I like an old-fashioned tile cutter better. It doesn't make much noise, it's a lot less dangerous and it doesn't make a mess since the tiles are scored and broken rather than cut.

Since I didn't exactly trust the floor to be level I started one course above the floor and nailed small strips of wood to the walls as guides. Some things I learned the hard way about this method:
- Don't use dabs of thinset in addition to nails unless you're sure you can take down the guide strips again within a few hours
- Make absolutely sure you put these strips up level
- Make absolutely sure to put these strips up at the correct height!

I didn't and so we ended up having lower skirtings in the bathroom.

I also calculated the number of tiles I'd need for each wall and if I'd have ended up with a very narrow strip on one side I'd start with half tiles instead of whole ones. That way you have half a tile on one side and slightly more than half on the other instead of a whole one on one side and a narrow strip on the other. Things you learn on the web and from watching tile layers!


Cutting the trim pieces was more of a challenge than we'd expected. The borrowed tile cutter wasn't awfully precise and our first own one even less so. In the end our trim pieces varied in height by up to 1 mm, which is noticeable if you have 2.5 mm joints. Nobody's perfect...

The old window was rotted beyond repair and one casement was already a non-matching replacement so we decided to replace the whole window. We definitely didn't care for a repeat performance with Mr. D who bodgered our other two new windows so we looked into other options. A local carpenter never bothered to actually make an offer so we decided he probably wasn't interested. In the end we decided on a "long-term temporary" compromise. Unlike most traditional Austrian windows (that are actually two sets of windows in a common frame in order to increase insulation) this was actually two windows in one opening, each with its own frame. Therefore we decided to leave the outer window in place for looks and replace the inner set of casements with an undivided double-glazed casement. Doesn't look good but cost about 1/3 of a proper wooden replacement window (i.e. a set of two true-divided light casements). Waiting for the window to be delivered and installed (8 weeks order time) slowed down our progress considerably.

Once we opened the first boxes of floor tiles we knew we were in BIG trouble. Instead of being the same size, the black tiles were several mm smaller than the white ones in both directions! We immediately called the store and complained, only to be told: "You want to mix different colours? You mustn't do that! You always have to check with the manufacturer if that's possible before ordering! Variations of up to 5% are perfectly acceptable!". Continental European customer service at its finest, customers begging for the mercy of being granted the honour of buying something. We did bother to mention that a) we HAD in fact mentioned that we intended to mix and b) the differency considerably exceeded 5% but at that time we didn't really want to return all the tile to Vienna and start shopping and arguing from scratch again.

Instead we used creative spacing and made do with what we had. That worked, although with the unfortunate side effect that the white grout really emphasises the size difference. I guess we'll have to live with it. My parents suggested black grout for the bathroom but I think that'll get dirty rather quickly.

The floor itself is interesting as well. The base is a thin concrete slab. On top of that we put down pink foam board with a fibreglass mesh and cement coat. This type of insulation is specifically designed as a tiling substrate. It's laid in thinset using a notched trowel and that's one of its core weaknesses. There are always some air bubbles below the foam board and in those spots any object falling on the finished tile floor makes weird hollow noises. And there are quite a few of those spots! Another issue is the amount of flex in the foam board. In order to prevent the tile floor from cracking we used flexible modified thinset and flexible grout. Furthermore, we put down plastic mesh before applying the thinset. In the WC I only covered the seams, in the bathroom I simply put down mesh everywhere.


Anyway, that's where we are now:


Sunday, December 8, 2013

Comments

Ok, I'm done with comments on blogger. As of today I noticed that the captchas have become utterly unintelligible so unless they change their design again I won't be able to comment on blog posts any more.

Monday, March 25, 2013

Floor Update

Old Austrian ceilings are usually rather complex.
The load-bearing layer is the usual plaster&lath setup with heavy timbers as joists (and I mean HUGE, the ones in my bedroom are something like 18 by 28 cm or 7x11"!). On top of it there is a board-and-batten subfloor. The battens are designed to keep the layer above from falling down, that is the sound insulation. The easiest way of reducing sound transmission through a ceiling is sheer weight and the old-timers knew that. So they simply shoveled 10 cm+ (4") of sand, clay, broken mortar, bricks and other construction debris on top of the lower subfloor. In this dirt fill they embedded sleepers (2x3s) for either the second subfloor (in case of herringbone) or the finished floor (planks).

The old mix weighs around a tonne per cubic metre and did a decent job. Modern alternatives are often MUCH lighter (200-300 kg) and much worse. The best option in terms of weight would have been clay but that is expensive and needs to dry for a loooong time. Therefore after lengthy negotiations we chose Liapor Fit, which is double-fired clay granulate.

The battens in this room were partially damaged, put on crooked right from the beginning plus there were some splits and knots in the floor that allowed the old fill to fall down into the joist space. We requested the floor to be covered with paper or felt to prevent this but the contractor refused to do that. His guys did take some old boards and nailed them over the worst holes (after we told them) and filled some other gaps with *gasp* expanding foam. Then they built the subfloor.

Yesterday I worked on the wiring for the ceiling light one floor below and the instant I touched the cable I was showered with Liapor! Upon closer inspection we also discovered a nice sink hole above! That means there's a substantial hole (or in fact there are probably several as I found at least two sink holes) through which the nice new stuff can disappear!

On the plus side today the painters showed up to remove the leftover old distemper and skim the walls. Tomorrow they're supposed to shellac the water stains and skim another time. Then it's on to painting!