Sunday, July 27, 2014

Plumbing, Tile and Carpentry

As promised, here are a few pictures of the bathroom nearing completion!
The floor still isn't grouted because I managed to pick the wrong colour when I bought supplies on a surprise trip to Vienna (some friends had booked tickets for a tour to a never-opened nuclear power station back in February and I'd completely forgotten about it) so the floor is still on hold.
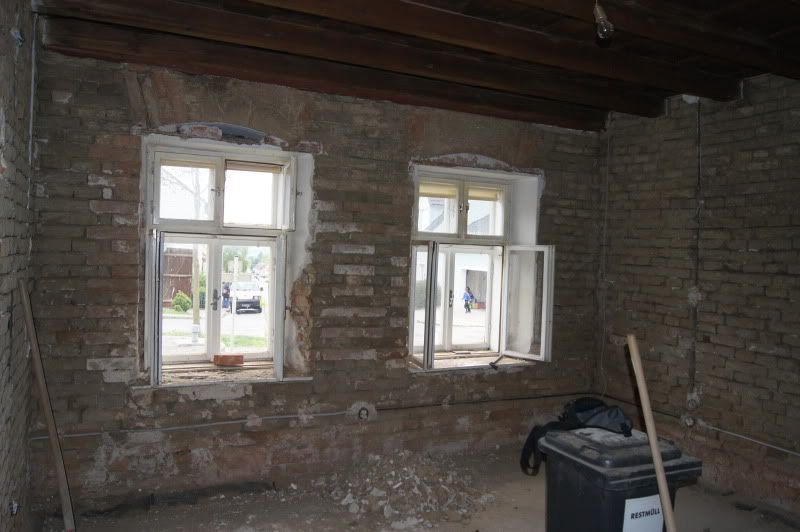
Before the plumber arrived the bathroom looked like this:


 On Thursday afternoon we bought a new drain assembly at a small hardware store just across the border because we didn't want to go the whole 50 km round trip to the nearest DIY store. It cost CSK 44 (less than €2) but it's half plastic so I'm not sure how long it'll last. Anyway, yesterday we finished the bathroom plumbing and now have a working sink - for the first time since 2009 I think.
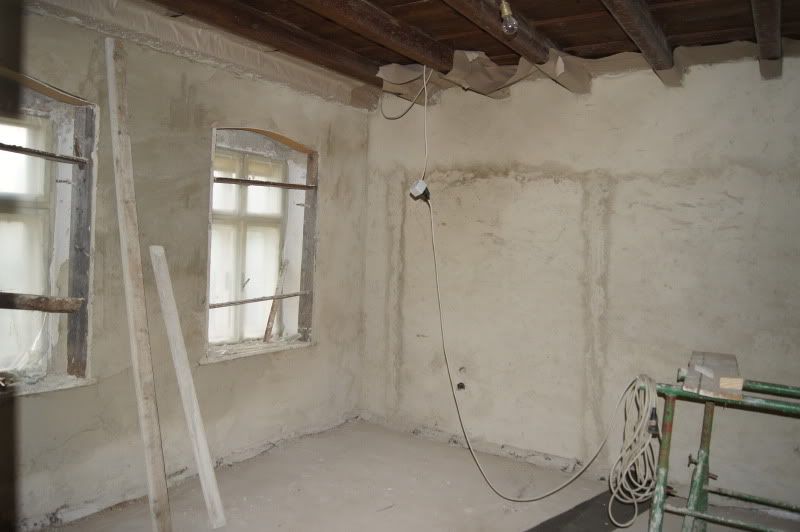
Here's how the bathroom looks right now:


Yesterday I stripped all the door casings that had loose paint on it. I really don't like our new Black & Decker heatgun because it vibrates much more than the old house brand one we had before (the old one still works but it's in Vienna). My left hand still feels a bit numb from the work I did yesterday!

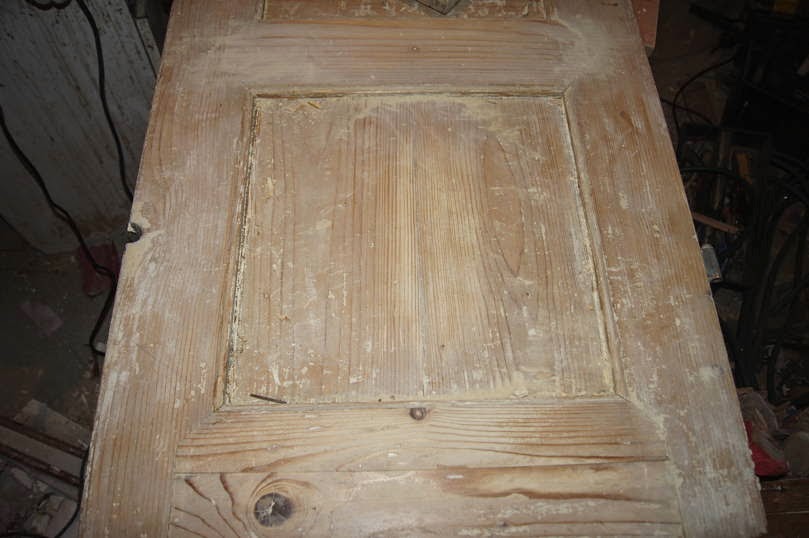
Once I was done with that I went on to repair a cracked door panel. The WC door is in somewhat sorry state. We found it leaning against a wall in a rather damp cellar so the bottom is quite badly rotted. The lock was frozen solid so I disassembled, cleaned and greased it. Also there were a few dozen coats of paint, some lifting and chipping from the damp. The bottom panel had a 5 mm crack running top to bottom ( a hide glue joint that separated long ago I think). Last year I watched a carpenter repair a door panel and used his technique. First I screwed blocks of scrap wood to the door on each side of the crack. Then I squeezed some glue into the gap (careful not to get any into the groove the panel sits in, the panel itself is supposed to move freely as the wood expands and contracts!) and clamped the wood scraps together.



When I tried cut and install the door casings I ran into a problem. We (and I think that means I) apparently made a systematic error sizing the frames for the salvaged doors. I'm not 100% sure what happened back then but I suspect I only measured the width of the door, neglecting the fact that there has to be a small gap between the door and casings so the door can move. On the existing doors that's between 4 and 5 mm on each side, so our frames are 8 to 10 mm too narrow. *ugh*

We decided to move the casings out by 2 mm on each side creating a wider rabbet on the frame and shaving 2 mm off the door on each side. That gets us the desired 4 mm gap. The only problem is that we need to deepen the mortice for the lock. That's what we're going to try today.
We can't hang the doors yet because the old-style hinges require a special chisel that can cut very thin grooves (1 to 2 mm) in a solid block of wood, sort of half rasp half chisel. These hinges are not screwed to the jamb but actually set into a pocket in the jamb and then secured driving nails through both the jamb and the hinge. The good thing is unless the jamb cracks these hinges are NEVER going to come back out. The bad thing is you need proper tools and it's not that easy. Our carpenter does have the tool but he's chicken that the aerated concrete block walls will tumble when he installs the hinges. Now I'm looking at one of those chisels on eBay. There's an Amazon seller who has two for €24 but he doesn't specify the thickness, which is pretty ridiculous since length and width really don't matter in this case. A woodworking online store sells them for €54(!) each! That's a whole lot more than I'm willing to spend for two doors!

Installing the sockets didn't go smoothly either. You're supposed to set the boxes flush with the wall and then tile up to the box so the socket itself is in fact installed on the tile. The holes are a bit off-set in this case and the old (1960s) sockets I wanted to use are designed to be installed flush with the box. With the tile beween socket and box the metal claws that can be used to hold the socket in place collide with the plastic bits of the box that hold the mountin screws (a continental European socket can be installed either using claws that spread against the walls of the box or using sheet metal screws on either side). Since the hole is a bit off I can't use screws (one screw hole is covered over) and the claws hit the box. I'll have to try to cut the tile back a bit or use modern sockets.

Thursday, July 24, 2014

Bathroom Progress

I arrived late on Sunday and set to work on Monday (not that early either). Tiling the floor turned out to be more problematic than we'd expected because the tiles are so incredibly hard!

I'm not sure if I've mentioned that before but the idea was to do everything without power tools, except for drilling a few holes. We had a tile cutter, carbide saw, carbide file and tile nippers. These tools worked like a charm for the wall tiles but not so much for the harder floor tiles. In fact after the first cut the carbide saw didn't really cut any more. We managed to cut the first tile around the floor drain taking turns with the saw (I think the two 5-cm cuts took more than half an hour) but the second one broke at the very end. My dad decided to superglue it back together instead of recutting it, I only hope that won't cut any toes. At that point we'd happily have used the angle grinder but unfortunately it seems to be in Vienna. Around 10 PM the floor was still 9 tiles short, two of which needed deep (10 cm) cutouts for the radiator pipes. I also ran out of thinset and motivation so I called it a day.

On Tuesday I started by scraping any excess thinset from the wall tile joints, which took a few hours as well. Then we went to the DIY store because we had to buy fixtures and black flexible grout for the floor. We didn't get any grout because two DIY stores only had non-flexible black grout and we're worried about cracking since the tiles are installed on EPS board. We did grab a super-cheap angle grinder (€29.90) and a tile cutting blade (set of three for €5.99, a single one would have been 26.99).
Back home I started grouting the walls and when I ran out of motivation after 1 1/2 walls finished the floor.

Yesterday I finished grouting the walls and we did a lot of cleanup in preparation for the plumber to come today and install the sinks, taps etc. Once that was done I stripped some door casings so we can get the bathroom close to finished. We have a huge pile of casings but most of them are lonely individuals and it's hard to find enough for a door. The first set I stripped was originally finished with shellac and came out really nicely so it seemed like a crime to paint it. The bathroom door was originally painted so I needed more casings.

After a lot of searching I found two matching upright pieces but no top piece and no other matching pieces I could shorten. Nothing. The second round of searching yielded the remains of one long piece - cut in half lengthwise by our beloved carpenter. You really can't let him work without constant supervision! Late at night I finally found another matching piece but two out of the three pieces have various strike plates that need to be removed, the damaged wood cut out and patched.

Today the plumber arrived at 10 and I helped him install everything. The bath taps went in flawlessly, as did the washing machine tap and trap cover. Then I installed the small WC sink while the plumber did the bathroom sink. He quickly discovered that we'd bought the wrong type of drain assembly! We'd thought we'd use the type that uses a lever to operate the plug but in fact the mixer taps we bought don't have that lever (I think it's actually designed for a kitchen sink) so we need a drain for a rubber plug. Other than that the bathroom is now in working condition! The WC sink made a bit of trouble as well. Long ago when I did the drains I must have mis-measured somehow so the drain was far too close to the floor. We ended up using the longest trap pipe we could find and a 10 cm extension on top of that. Looks a bit weird but functional. I only hope no one ever bumps into that contraption.

So where are we?
The bathroom floor needs to be grouted, all the corners need a few miles of silicone, the doors have to be hung and painted, the walls have to be painted and I still have to install sockets in the bathroom (yup, we can have that here provided they're at least 60 cm from the shower or bath).

Pictures to follow soon!

Saturday, June 14, 2014

Tiles

I promised a more detailed update on what little work we did over the last 2 years and here it is.

We're mostly done tiling the small WC and the larger bathroom but not quite there yet. I'd have loved to do a real vintage-style tile design but this is a family job and my parents own the house, so they had a substantial say in this. In the end after lengthy discussions we agreed on plan white 8x8 (20x20 cm) tiles with black skirting (base trim) and border. Shopping for tile was an experience in itself since this plan was absolutely against current fashion trends. First we went to a small tile and construction supplies store. Most of the tiles the elderly owner showed us were huge (up to 12x24 or 30x60 cm) and beige-y or grey. I said we didn't want beige or grey tiles because they didn't look too good with our existing wood ceiling. To which he replied: "You have to lower the ceiling and plasterboard it anyway! For the recessed lights!" (he used the pseudo-English word "Spots" and pronounced it "Shpotts", which sounds like Spott, German for ridicule). At that point I was ready to ignore all his advice.

Off we went to the next store. They had a small selection of smaller white and solid-coloured tiles and we eventually agreed on the cheapest. This manufacturer didn't offer border tiles and we thought we could avoid ordering Villeroy & Boch borders by cutting our own.

For the floor we chose black and white tiles from the same manufacturer for a chequered pattern (and mentioned this plan to the sales girl). This bit of info will become important later. Order time was 4-6 weeks so we had some time for other stuff. The two rooms are small (the bathroom is 2.35x1.85 m or slightly over 8x6' and the WC is only 0.9x1.2 m or 3x4') and we didn't tile up to the ceiling but we still had a lot of tile boxes. Heavy boxes! I can't remember the weight but I think we essentially maxed out my parents' trusty old Mitsubishi van since we also loaded about 150 kg of thinset and 50 kg of self-leveling floor leveler.

Tiling was a rather time-consuming process, especially the small bits and pieces. The large sections of wall that mostly use whole tiles go reasonably fast and then when it comes to cutting every single tile progress slows to snail's pace. I'm not awfully fond of tiling either but at least I'm getting better at it. My first tile job far back in 2002 definitely sucked!
We did the whole job almost without power tools, except for a drill with masonry bit. Our tools were a traditional tile cutter (first we borrowed one from a friend's mom, then I bought a used one for 5 Euros and finally we broke down and bought a new one for 65 Euros), a carbide file, tile nippers and a large tile saw (looks like a giant coping saw). For the softer wall tiles these tools are rather easy to use but for the hard floor tiles the file was essentially useless and the saw was hard on the arms as well. On the other hand the hand saw allows for rather intricate cuts that just aren't possible using a wet tile saw or angle grinder. Electric tile saws are great for some kinds of tile (I once had to lay large rock-hard floor tiles with a surface scored to look like small brick with wide joints and those were impossible to cut without a wet tile saw) but generally I like an old-fashioned tile cutter better. It doesn't make much noise, it's a lot less dangerous and it doesn't make a mess since the tiles are scored and broken rather than cut.

Since I didn't exactly trust the floor to be level I started one course above the floor and nailed small strips of wood to the walls as guides. Some things I learned the hard way about this method:
- Don't use dabs of thinset in addition to nails unless you're sure you can take down the guide strips again within a few hours
- Make absolutely sure you put these strips up level
- Make absolutely sure to put these strips up at the correct height!

I didn't and so we ended up having lower skirtings in the bathroom.

I also calculated the number of tiles I'd need for each wall and if I'd have ended up with a very narrow strip on one side I'd start with half tiles instead of whole ones. That way you have half a tile on one side and slightly more than half on the other instead of a whole one on one side and a narrow strip on the other. Things you learn on the web and from watching tile layers!


Cutting the trim pieces was more of a challenge than we'd expected. The borrowed tile cutter wasn't awfully precise and our first own one even less so. In the end our trim pieces varied in height by up to 1 mm, which is noticeable if you have 2.5 mm joints. Nobody's perfect...

The old window was rotted beyond repair and one casement was already a non-matching replacement so we decided to replace the whole window. We definitely didn't care for a repeat performance with Mr. D who bodgered our other two new windows so we looked into other options. A local carpenter never bothered to actually make an offer so we decided he probably wasn't interested. In the end we decided on a "long-term temporary" compromise. Unlike most traditional Austrian windows (that are actually two sets of windows in a common frame in order to increase insulation) this was actually two windows in one opening, each with its own frame. Therefore we decided to leave the outer window in place for looks and replace the inner set of casements with an undivided double-glazed casement. Doesn't look good but cost about 1/3 of a proper wooden replacement window (i.e. a set of two true-divided light casements). Waiting for the window to be delivered and installed (8 weeks order time) slowed down our progress considerably.

Once we opened the first boxes of floor tiles we knew we were in BIG trouble. Instead of being the same size, the black tiles were several mm smaller than the white ones in both directions! We immediately called the store and complained, only to be told: "You want to mix different colours? You mustn't do that! You always have to check with the manufacturer if that's possible before ordering! Variations of up to 5% are perfectly acceptable!". Continental European customer service at its finest, customers begging for the mercy of being granted the honour of buying something. We did bother to mention that a) we HAD in fact mentioned that we intended to mix and b) the differency considerably exceeded 5% but at that time we didn't really want to return all the tile to Vienna and start shopping and arguing from scratch again.

Instead we used creative spacing and made do with what we had. That worked, although with the unfortunate side effect that the white grout really emphasises the size difference. I guess we'll have to live with it. My parents suggested black grout for the bathroom but I think that'll get dirty rather quickly.

The floor itself is interesting as well. The base is a thin concrete slab. On top of that we put down pink foam board with a fibreglass mesh and cement coat. This type of insulation is specifically designed as a tiling substrate. It's laid in thinset using a notched trowel and that's one of its core weaknesses. There are always some air bubbles below the foam board and in those spots any object falling on the finished tile floor makes weird hollow noises. And there are quite a few of those spots! Another issue is the amount of flex in the foam board. In order to prevent the tile floor from cracking we used flexible modified thinset and flexible grout. Furthermore, we put down plastic mesh before applying the thinset. In the WC I only covered the seams, in the bathroom I simply put down mesh everywhere.


Anyway, that's where we are now:


Sunday, December 8, 2013

Comments

Ok, I'm done with comments on blogger. As of today I noticed that the captchas have become utterly unintelligible so unless they change their design again I won't be able to comment on blog posts any more.

Monday, March 25, 2013

Floor Update

Old Austrian ceilings are usually rather complex.
The load-bearing layer is the usual plaster&lath setup with heavy timbers as joists (and I mean HUGE, the ones in my bedroom are something like 18 by 28 cm or 7x11"!). On top of it there is a board-and-batten subfloor. The battens are designed to keep the layer above from falling down, that is the sound insulation. The easiest way of reducing sound transmission through a ceiling is sheer weight and the old-timers knew that. So they simply shoveled 10 cm+ (4") of sand, clay, broken mortar, bricks and other construction debris on top of the lower subfloor. In this dirt fill they embedded sleepers (2x3s) for either the second subfloor (in case of herringbone) or the finished floor (planks).

The old mix weighs around a tonne per cubic metre and did a decent job. Modern alternatives are often MUCH lighter (200-300 kg) and much worse. The best option in terms of weight would have been clay but that is expensive and needs to dry for a loooong time. Therefore after lengthy negotiations we chose Liapor Fit, which is double-fired clay granulate.

The battens in this room were partially damaged, put on crooked right from the beginning plus there were some splits and knots in the floor that allowed the old fill to fall down into the joist space. We requested the floor to be covered with paper or felt to prevent this but the contractor refused to do that. His guys did take some old boards and nailed them over the worst holes (after we told them) and filled some other gaps with *gasp* expanding foam. Then they built the subfloor.

Yesterday I worked on the wiring for the ceiling light one floor below and the instant I touched the cable I was showered with Liapor! Upon closer inspection we also discovered a nice sink hole above! That means there's a substantial hole (or in fact there are probably several as I found at least two sink holes) through which the nice new stuff can disappear!

On the plus side today the painters showed up to remove the leftover old distemper and skim the walls. Tomorrow they're supposed to shellac the water stains and skim another time. Then it's on to painting!

Progress

We spent Easter hurrying to complete a bunch of details since our mason promised to start plastering if we finished. So we spent the better part of two days scraping loose mortar/plaster out of brick joints in the front room and wired both the small bedroom and the last missing outlet in the front room.

With that done, the mason could finally plaster the front room! The first room that looks like a room again! Whoooooppppeeee!

This
                           became this


PS: I just realised that I'd never finished this post, probably because I found posting pictures too annoying. So I decided to post it with just these two pictures. The second picture is just a "during", taken before the finish coat was applied.

Saturday, March 23, 2013

Again, a loooooong time has passed without updates. The flat I mentioned in the last post is mainly done, except the owner now wants to install central heating (great idea to replace the boiler just after we finished tiling the kitchen!). Only she didn't have time and energy to deal with plumbers, so the place is still sitting empty and half-finished (and half-full of old crap still).

In September work started at my home. We were scheduled to switch from combi boilers in every flat to a central wood pellet boiler in the cellar, which involved a stainless steel liner in an old chimney (inlcuding grinding out the flue to enlarge it), running big pipes in abandoned flues and just about trashing all the bathrooms, replacing the sleek combi boilers with pumps, meters, heat exchangers and plenty of exposed copper and PVC pipework - and of course plenty of rewiring, as the bloody boiler requires 3-phase 400 V power! The installation went on well into November and the hot water supply STILL doesn't work properly - the plumbers have to change some menu settings and replace a relay in every flat.

On Dec. 21 we had our little personal apocalypse when the top floor flat burned out and the firefighters flooded all three flats below. All my personal belongings (except for the mattress and some other minor items) were saved, but the plaster ceiling suffered and the oak herringbone parquet had standing water overnight, even though we used every bucket and tub we could find in the house. After MUCH debate with the insurance company, the floor was taken out to dry. Currently, the new subfloor is in and we are trying to finish some while-we-are-at-it wiring before the painters come in on Monday to scrape the old paint and skim-coat the walls and ceiling. Then it's on to painting and re-installing the floor. I'm still not sure how much I trust the contractors and what I'll let them do.

I also rewired parts of my cousin's flat (below ours), pretty much in the nick of time to prevent another fire. Some of the wiring was 100 years old and completely brittle. A note of caution to everybody: flush halogen fixtures are a sure way to fry the wiring inside the ceiling, especially (but not only) if it's old! And bare wires in a wooden (plaster and lath) ceiling are a sure recipe for disaster!

Progress at the farm has been minimal. We did get the WC tiled and mostly finished (only missing sink and door plus some painting), the better part of the bathroom is tiled, the bath is in (but not tiled yet) and two floors are done.

I removed the floor from the last post again, you can read all the gory details here:
https://www.wavyglass.org/viewtopic.php?f=7&t=60

We also installed a new larch floor in the small bedroom. This one had been stored in the house for months, so it worked fine. It still needs to be finished though.